Home > Products > Miscellaneous utilities > Passcape ISO Burner > Screenshots
Passcape ISO Burner screenshots
17.04.2024
Reset Windows Password v14.2
Telegram data recovery, Photo Database and Media Player investigation tools, and some more
12.04.2024
Office password recovery tools
Resetting VBA passwords
01.03.2024
New blog post
Dumping the history of users' IP addresses in Windows
20.02.2024
Reset Windows Password v14.1
IP addresses history viewer, fast disk search, local security editor and some more

Articles and video

You may find it helpful to read our articles on Windows security and password recovery examples. Video section contains a number of movies about our programs in action

Passcape ISO Burner screenshots

Passcape ISO Burner

Passcape ISO Burner

Passcape ISO Burner is the application for creating CD, DVD or USB disks from ISO 9660 images. PIB supports creating bootable disks (for example, WinPE, BartPE or Reset Windows Password).

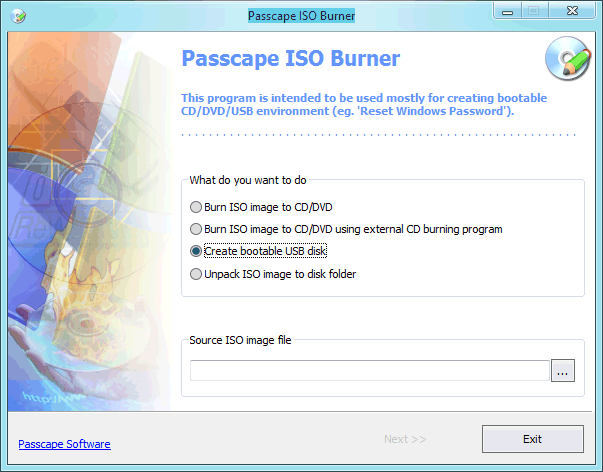
The program's interface is extremely simple. When started, it asks you to select what you would like to do:

  • Record ISO image to CD/DVD
  • Record ISO image to CD/DVD using an external burning application installed on your computer. For example, Nero or ImgBurn
  • Use ISO image to create a USB boot disk
  • Extract ISO image to disk (keep in mind that this action causes the loss of boot data)


Creating bootable CD/DVD

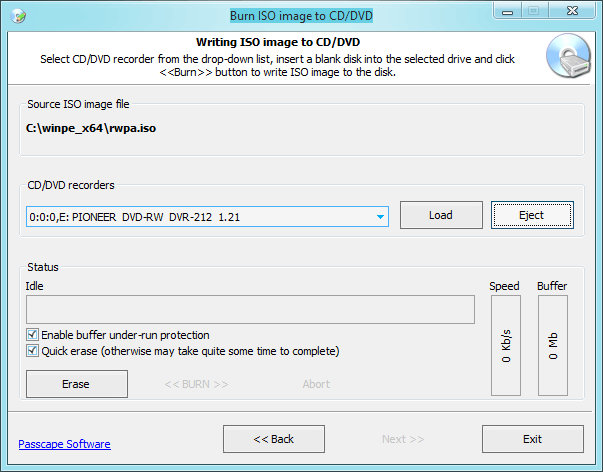
Creating bootable CD from ISO image

Select the first menu item: 'Burn ISO image to CD/DVD'. At the bottom of the screen, enter the path to the ISO image. That enables the 'Next' button, and you can move on to actually creating the disk. All we need to do in the burn disk dialog is select the recorder we are going to use, insert a blank CD/DVD in it and click on the <<BURN>> button to create a boot disk from the ISO image selected on the previous step.


Creating bootable USB disk

Create bootable USB disk

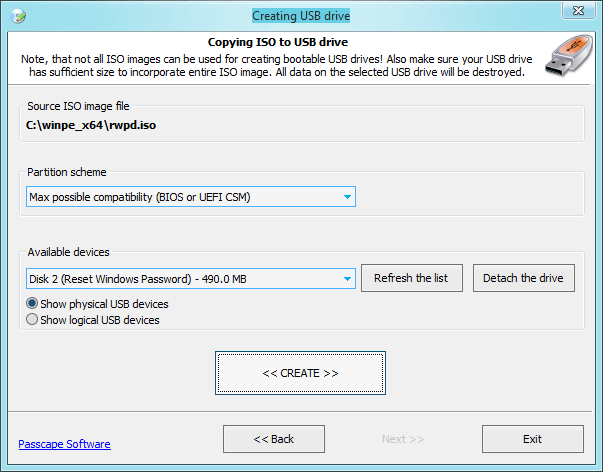
Select an existing bootable ISO image and set the 'Create bootable USB disk' option on. When the next window appears, plug the USB device into your computer; it should automatically appear on the list of found USB devices. Click the 'Create' button to format and create the boot USB. In some cases (for example, if the USB device is installed as a hard disk drive, and an extended partition entry is found on that disk) the program will require restarting for reassigning drive letters.

The program offers several partition schemes (formatting modes) to supply better compatibility when booting from USB devices. If you feel uncertain about what partition scheme to select, consider using the following simple algorithm:

  • If the target PC is based on UEFI (graphical boot options in most cases), select 'Max compatibility with new PCs (FAT32 MBR for UEFI)' mode. This scheme will create a USB to be run on UEFI-based PCs where Secure Boot Mode is turned on (it is on by default). All new PCs come with UEFI on board.
  • If your target PC is based on BIOS interface, select 'Max compatibility with old PCs (FAT32 MBR for BIOS)' mode. This scheme will create a USB that is fully compatible with BIOS firmware.
  • If you know nothing about the target PC, switch to 'Max possible compatibility' scheme. This mode creates bootable USBs that can run on both BIOS- and UEFI-based computers (with Compatibility Support Mode is turned on). On some PCs or laptops, the Compatibility Support Mode is also known as Legacy Boot Mode. You can manipulate this option freely.
Be careful! All data on the target drive will be overwritten. If the program is unable to detect boot files in the source ISO image, it will show the respective warning.